Introduction
In this tutorial we will be connecting a basic air quality sensor to collect data for other applications with Arduino. There are many sensors you can choose from depending on what gasses or aspect of air quality you are interested in. We were particularly interested in detecting levels of benzene as an indicator of air pollution caused by combustion engines.
For this tutorial we will be using the MQ-135 sensor which detects levels of: NH3, Benzene, Alcohol, NOx, CO2 and smoke.
For a larger list of sensors check this link
Parts List
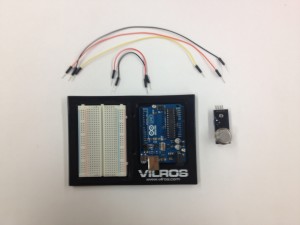
You will need:
- An Arduino unit. (we used the Uno)
- MQ-135 sensor (link to source)
- 5 – jumper wires
- Breadboard
Set Up
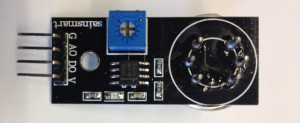
When looking at the sensor there are abbreviations next to the pins you need to wire.
G = Ground
AO = Analog Out
DO = Digital Out
V = Voltage (power source)
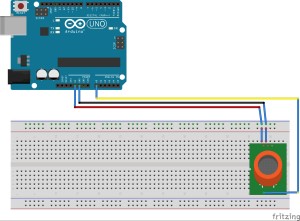
Here is a simple diagram of how your sensor should be wired to your Arduino.
Note: If you are using this particular sensor board you do not need to use a 10 ohm resistor as some of the basic diagrams for this sensor indicate.
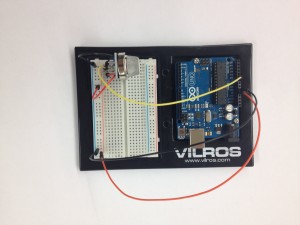
Here we have the sensor set up.
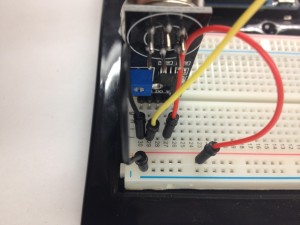
Close up of the sensor and the wiring.
For our power source we used the on board 5V output from Arduino. We wired that to the “V” tab of the sensor board
Next we wired the “G” tab to the ground on the Arduino.
The last step was to wire the Analog Output (AO) to the A0 input on the Arduino.
Code
In our code we wanted to float the voltage readings so that we could eventually use it in Processing applications.
We also wanted to convert the voltage readings of 0-1023 from the sensor to a 0.0-5.0 value which would reflect the true voltage being read.
|
1 2 3 4 5 6 7 8 9 10 11 12 13 14 15 16 17 18 19 20 21 22 23 24 25 |
const int gasSensor =0; void setup() { Serial.begin(9600); // sets the serial port to 9600 } void loop() { float voltage; voltage = getVoltage(gasSensor); Serial.println(voltage); delay(1000); } float getVoltage(int pin) { return (analogRead(pin) * 0.004882814); // This equation converts the 0 to 1023 value that analogRead() // returns, into a 0.0 to 5.0 value that is the true voltage // being read at that pin. } |
Run this code to your Arduino and you will be ready to detect changes in the level of detectable gasses!
Notes:
- After doing some research about this sensor it was discovered that while the MQ-135 can detect all of the gasses listed above, it cannot distinguish between them. If you are looking to specifically target one gas, it might be better to find a different sensor.
- This sensor also needs uses a heater to warm up the sensor. It has been advised to not use this with a small battery source as it will quickly drain your battery.
Additional Information:
